
This post contains affiliate links. We may earn a commission if you click on them and make a purchase. It’s at no extra cost to you and helps us run this site. Thanks for your support!
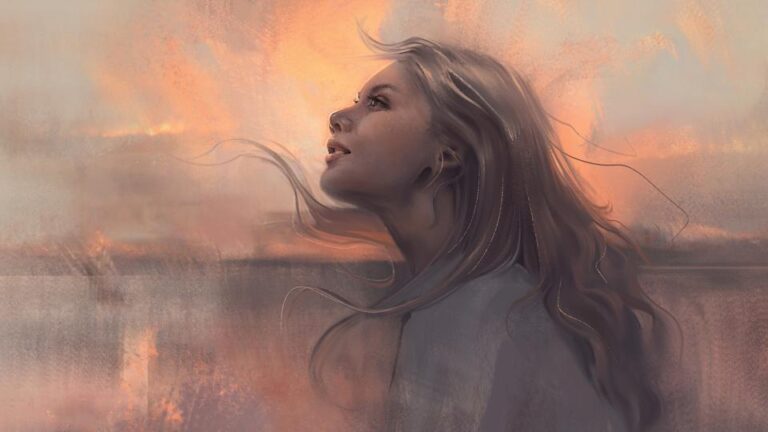
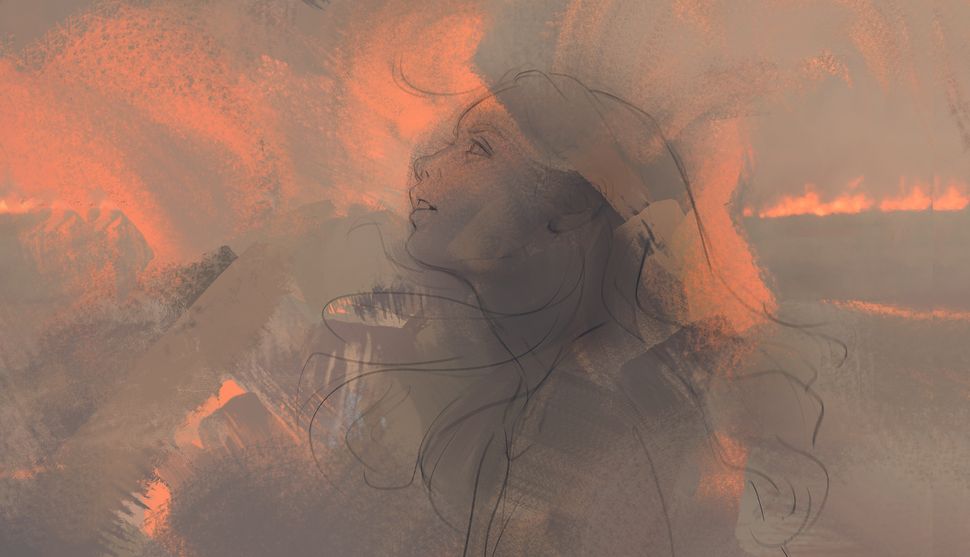
Traditional painting has a certain soul—the grain of the brushstroke, the imperfect blend of colors, the spontaneity. But what if you could inject that same charm into your digital creations? That’s exactly what digital painter Mandy Jurgens has mastered using just two powerhouse tools in Photoshop: the Pattern Stamp and the Mixer Brush.
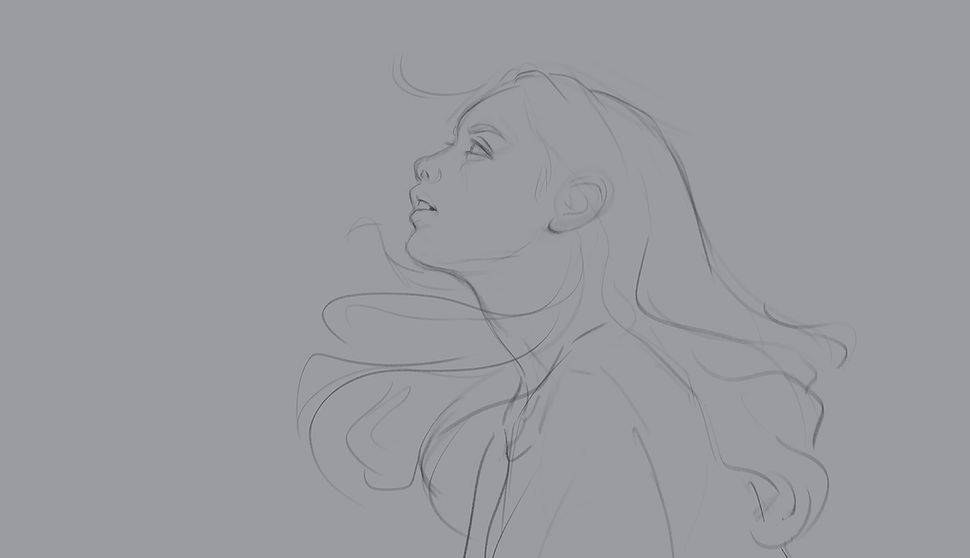
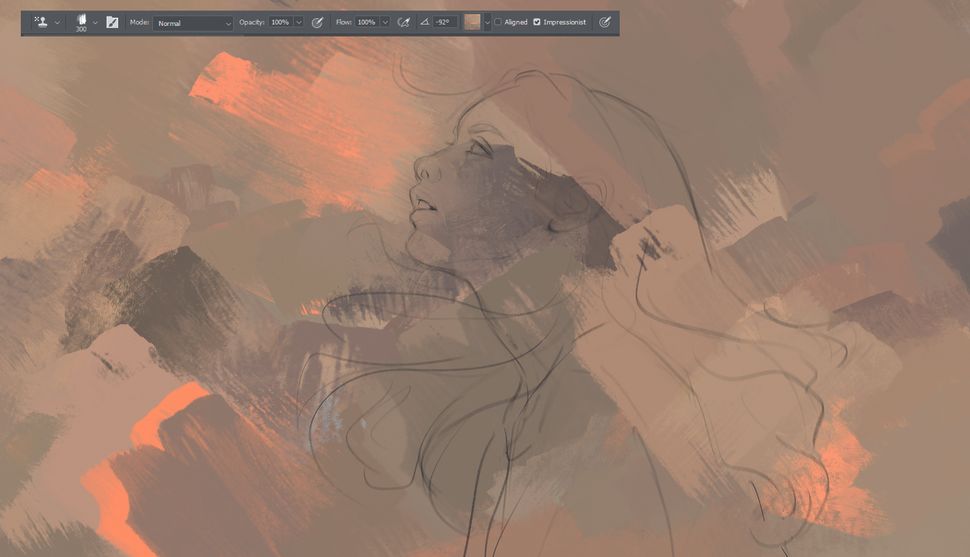
1. Start with a Rough Sketch
Make digital look traditional; a woman in front of a sunset
A traditional painting starts with an idea, but digital art begins with a sketch that doesn’t demand perfection—only direction. Start your canvas with a base of 50% grey; this neutral background acts like a tonal anchor, helping colors pop and shadows settle naturally. Keep your lines loose and gestural; your goal isn’t accuracy but energy. You’re setting the mood, not laying bricks.
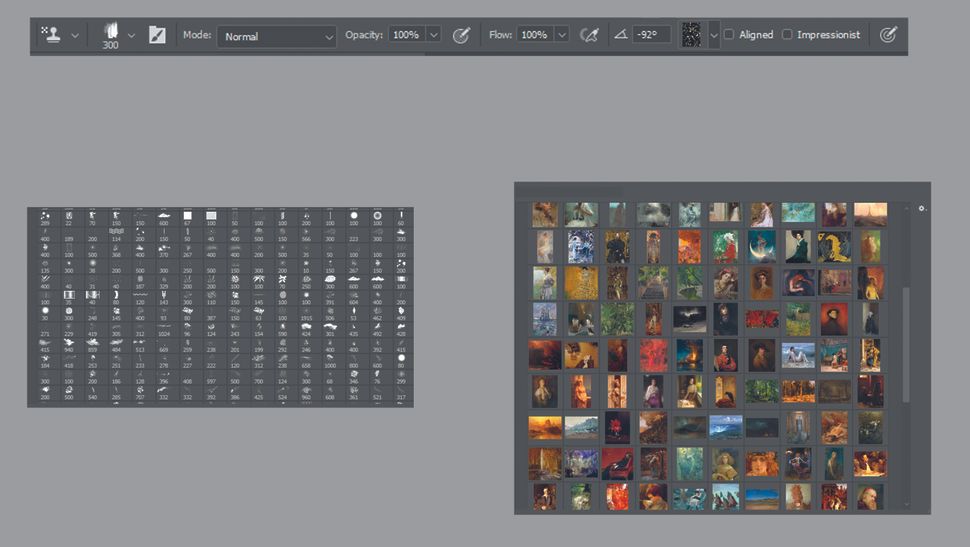
2. Choose Your Textures Wisely
Make digital look traditional; a woman in front of a sunset
The Pattern Stamp might just be Photoshop’s most underrated gem. It lets you imprint textures and colors directly from another image onto your canvas—think of it like a digital sponge soaked in Impressionist hues. With the right brush tip and a smartly chosen source image, you can lay down base textures that already feel like brushstrokes straight from an oil palette.
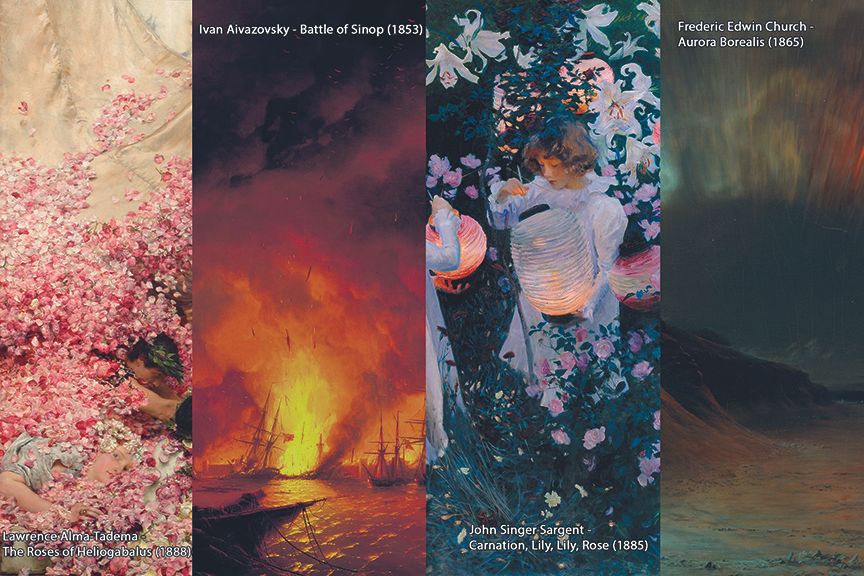
3. Paint Emotions with Colors
Make digital look traditional; a woman in front of a sunset
Your source images are key. You can use paintings by old masters, textures from nature, or even photos of fabrics or patterns. To use them with the Pattern Stamp tool, go to Edit > Define Pattern to load the image into your library. Make sure the images you select have a harmonious color palette that will work well together.
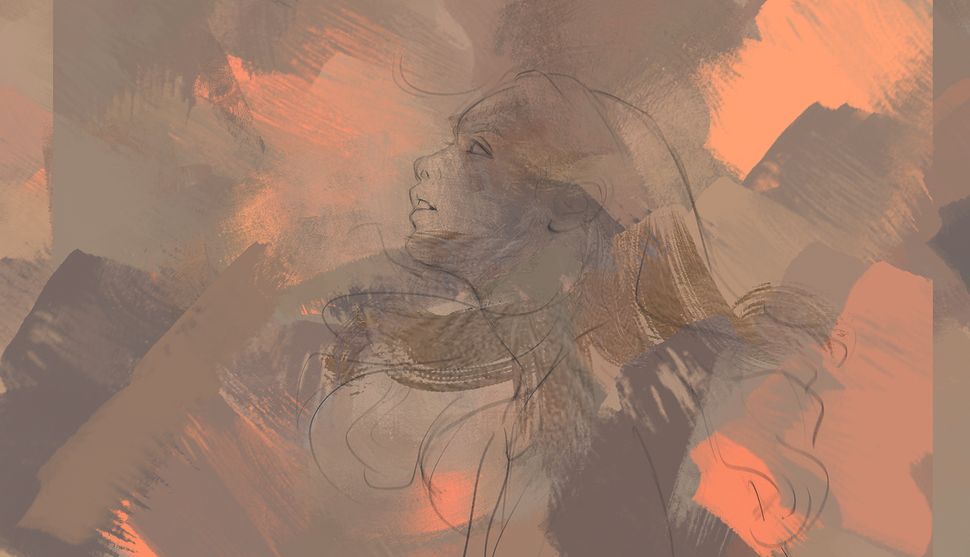
4. Embrace Controlled Chaos
Make digital look traditional; a woman in front of a sunset
The color palette sets the tone of your artwork. Choose a base color from your source image and apply it with the “Impressionist” setting. This will let Photoshop randomly pick colors from the image, giving you an organic, painterly effect. Use softer tones for a relaxed mood or bolder colors for a more dramatic feel.
5. Sculpt the Scene
Make digital look traditional; a woman in front of a sunset
Once you’ve added your base colors, feel free to adjust them by switching to a new source image or changing your brush settings. Keep experimenting with different color variations to add depth and interest. But be cautious with the “Impressionist” box—leaving it unchecked will apply the source image directly, which can sometimes be too rigid.
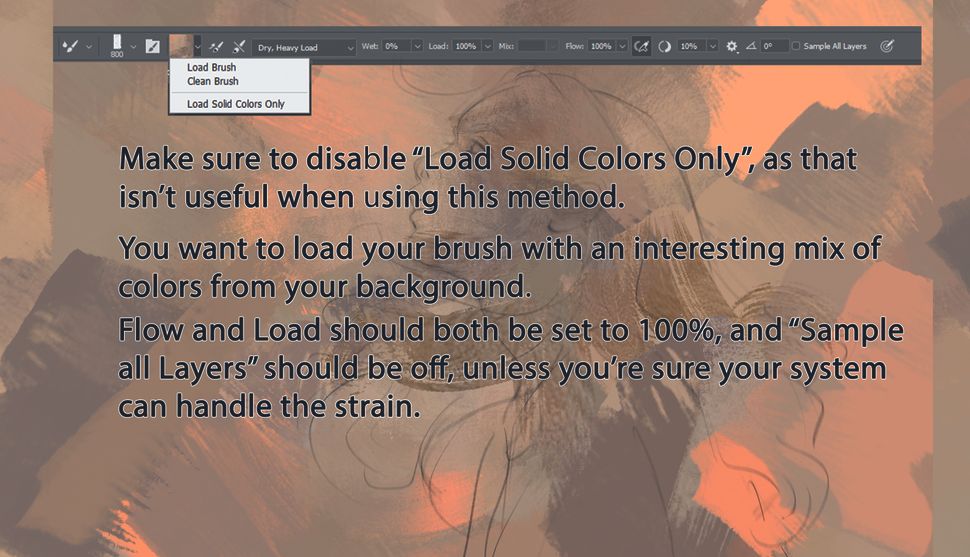
6. Paint with Light
Make digital look traditional; a woman in front of a sunset
The Mixer Brush is where the magic happens. It works like a traditional paintbrush by blending and mixing colors directly on the canvas. Set it to “Dry, Heavy Load” for bold, expressive strokes. This tool is excellent for creating the blending and texture you’d expect in oil or acrylic paintings.
7. Adjust, Smudge, Repeat
Make digital look traditional; a woman in front of a sunset
Now it’s time to begin defining the main areas of your composition. Focus on establishing light and shadow with broad strokes. Use soft brushes for a smooth blend between different tones. Think about the light source and how it interacts with the scene, especially when you’re defining the subject’s silhouette.
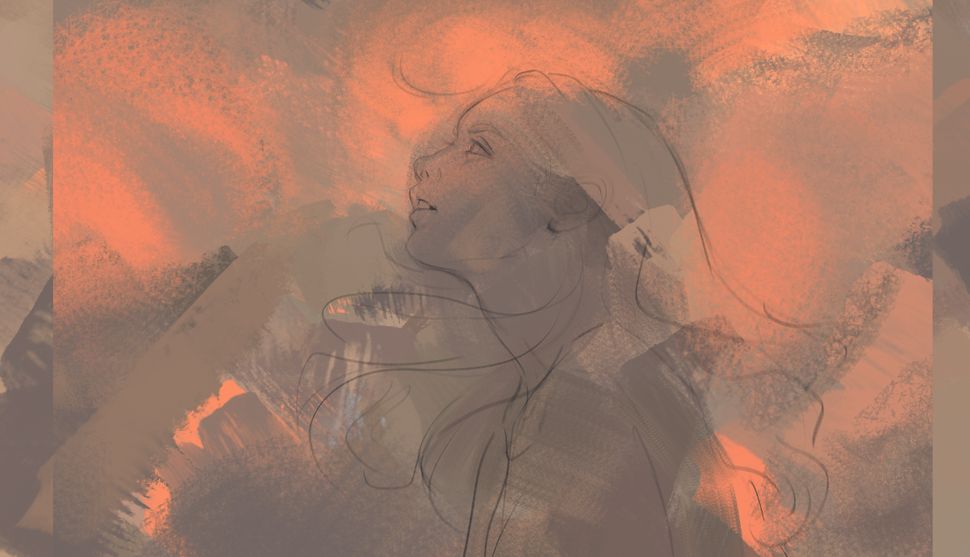
8. Finish Strong
Make digital look traditional; a woman in front of a sunset
Next, reintroduce the Pattern Stamp tool, this time using it for contrast. Stamp the source image into specific areas, especially around the subject’s face or other focal points. This adds texture and prepares those areas for further refinement with the Mixer Brush, helping you create a dynamic composition.
9. Detailing the Face

Make digital look traditional; a woman in front of a sunset
With the main structure in place, start detailing the face. Use the Mixer Brush to blend the light and shadow on the skin, highlighting the planes of the face, such as the cheekbones and forehead. The goal here isn’t to make every detail sharp, but to capture the soft, natural transitions you would see in traditional portraits.
10. Adding Hair and Refining Details

Make digital look traditional; a woman in front of a sunset
Now, add hair using broad strokes with the Mixer Brush. Don’t worry about fine details yet—just let the texture flow naturally. Once you’re happy with the general look, you can refine the facial features further. Focus on keeping the image feeling loose and painterly, avoiding sharp, unnatural lines.
11. Enhancing the Composition

Make digital look traditional; a woman in front of a sunset
Take a moment to step back and assess the overall composition. If needed, add elements like a mirrored sky to create a water effect or adjust the proportions with the Liquify tool. This step is about enhancing balance and ensuring that everything feels in harmony, with no single element overwhelming the others.
12. Refining the Face and Adding Depth

Make digital look traditional; a woman in front of a sunset
Revisit the face and add any necessary tweaks. Use the Mixer Brush to soften harsh edges and keep the look painterly. If you want more depth, subtly adjust the lighting on the face and the background, keeping everything coherent but with some areas in sharper focus than others.

HUION Kamvas 12 Graphic Tablet
HUION Kamvas 12 Graphic Tablet Monitor 11.6 Inch Anti-glare Screen Tilt Support Drawing Pen Display Battery-Free Digital Stylus.
13. Smudging and Refining the Hair

Make digital look traditional; a woman in front of a sunset
For the hair, switch to the Smudge Brush to refine and smooth out the strokes. Use it sparingly to keep the natural flow of the hair intact. Combine this with the Mixer Brush to avoid making the hair look too rigid. The goal is to keep it looking fluid and natural, like it’s been painted with care.
14. Finalizing the Details and Enhancements

Make digital look traditional; a woman in front of a sunset
Finish by refining the final details, like small highlights or adjustments in the lighting. You can use the Sharpen tool to bring attention to certain areas, such as the eyes or key focal points in the piece. Keep the overall look painterly by using the Mixer Brush for most of your work, and add finishing touches with subtle strokes.
Final Touch
By combining the versatility of digital tools with the unpredictability of traditional techniques, you breathe life into your canvas. The result? Artwork that feels hand-painted—because, in many ways, it still is.